Help Center/Email/Outlook
Answer two quick questions and we'll show you only the steps for your setup, with a picture for every click.
Answer questions 2 and 3 above and your steps will appear here.
6 steps. Tick each one off as you go.
It's the first tab, in the top-left corner of the Outlook window.
You'll see a page called Account Information. The button is just under your current account.
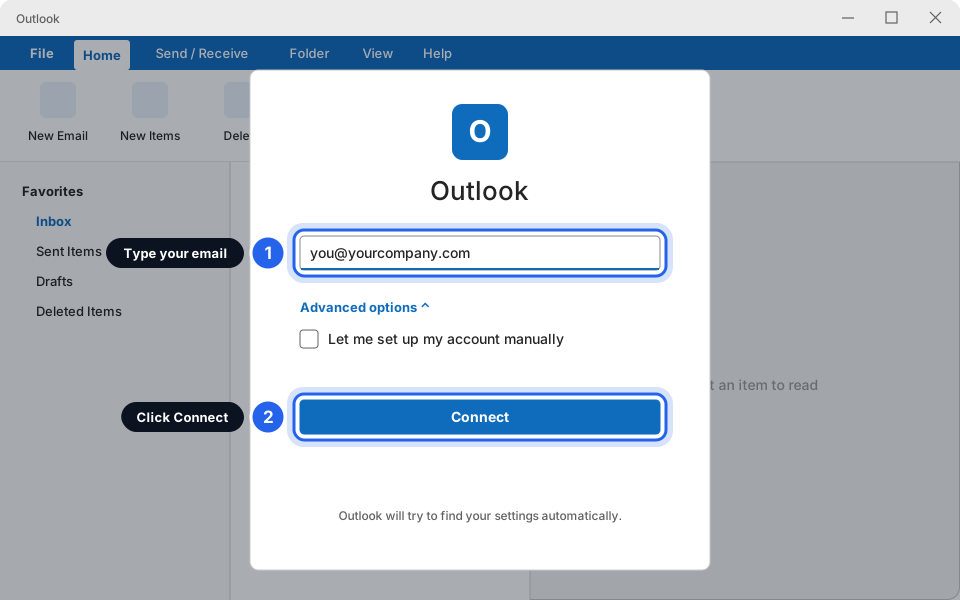
Type you@yourcompany.com exactly. Do not tick "Let me set up my account manually".
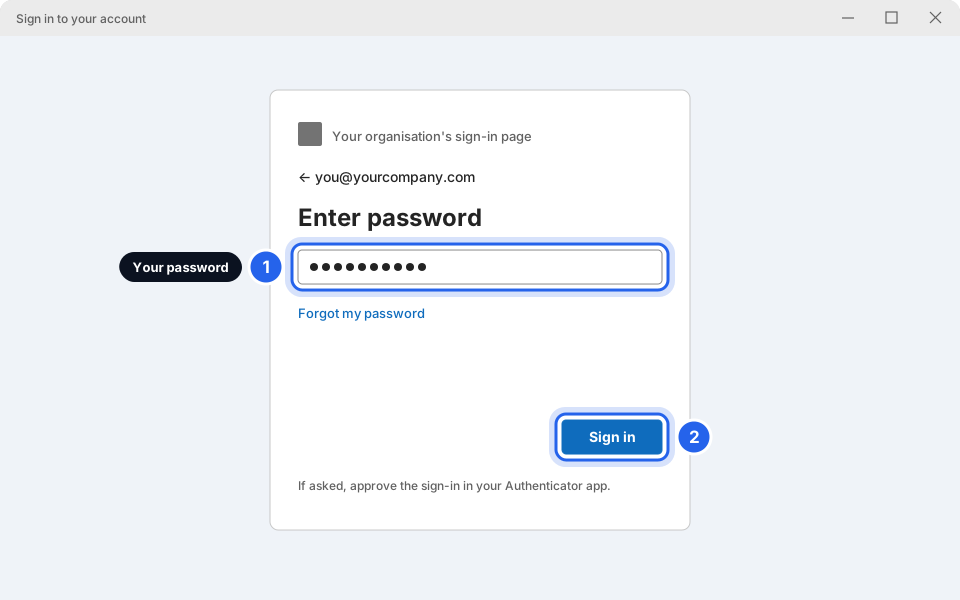
A sign-in window appears. It may show your company's logo. Type your email password.
If your phone buzzes, open the Microsoft Authenticator app and tap Approve (or type the number shown on screen).
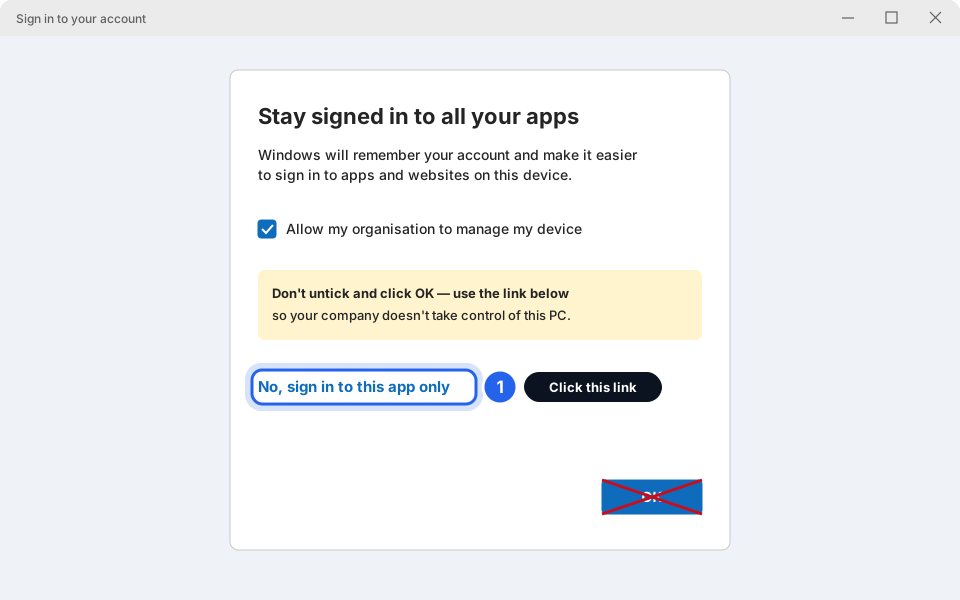
If you see "Stay signed in to all your apps", click the small blue link at the bottom. Don't click OK.
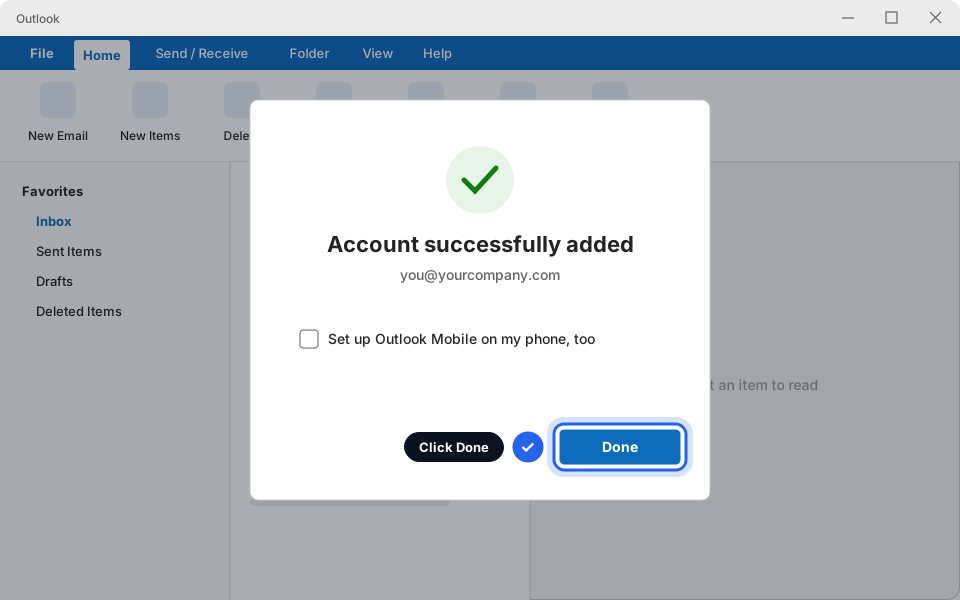
When you see "Account successfully added", untick Set up Outlook Mobile if you don't want it, and click Done. Close Outlook and open it again if your email doesn't show up straight away.
Your mailbox now shows in the folder list on the left. The first sync can take a few minutes on a big mailbox, so leave Outlook open.
Try the quick way first: most accounts set themselves up in 5 steps. If Outlook can't find your settings, Plan B walks you through typing them in.
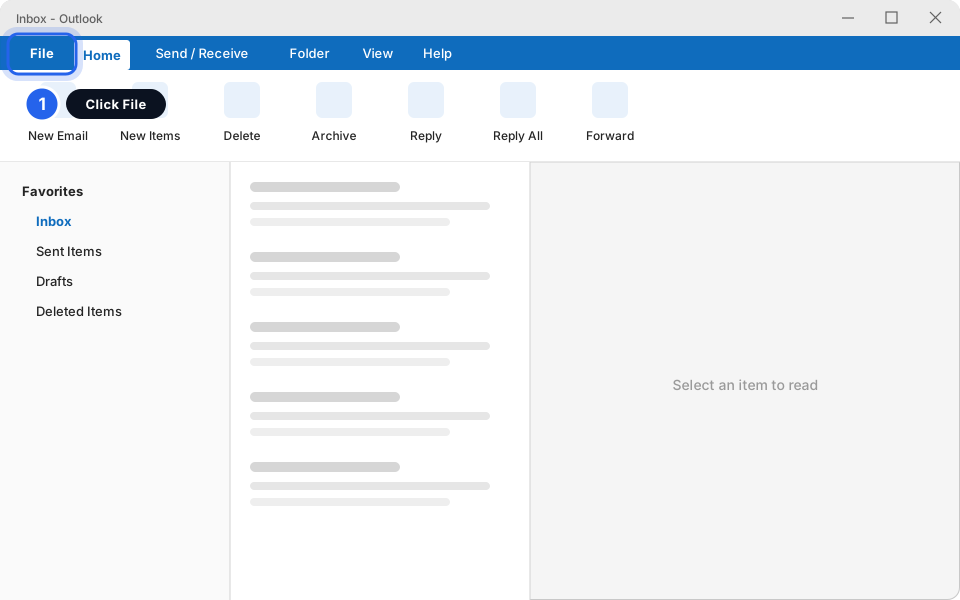
It's the first tab, in the top-left corner of the Outlook window.
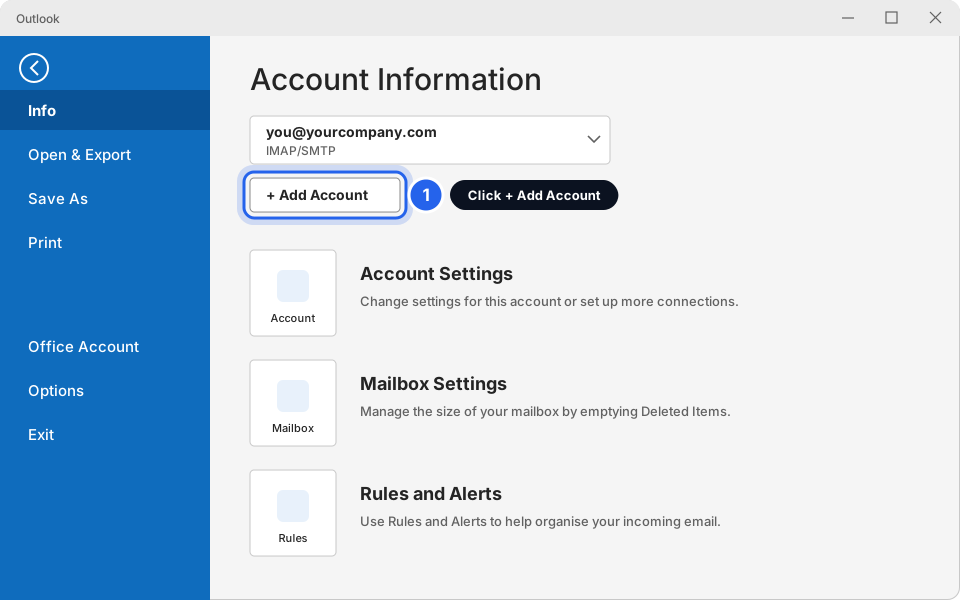
You'll see a page called Account Information. The button is just under your current account.
Type you@yourcompany.com exactly. Don't tick "Let me set up my account manually" yet. Outlook can usually find your settings by itself.
Wait a few seconds while Outlook looks for your settings. Then match your screen to one of these:
When you see "Account successfully added", click Done. That's it, no settings to type! Close Outlook and open it again if your email doesn't appear straight away.
Send yourself a test email to check that sending and receiving both work. If sending fails, see Troubleshooting below.
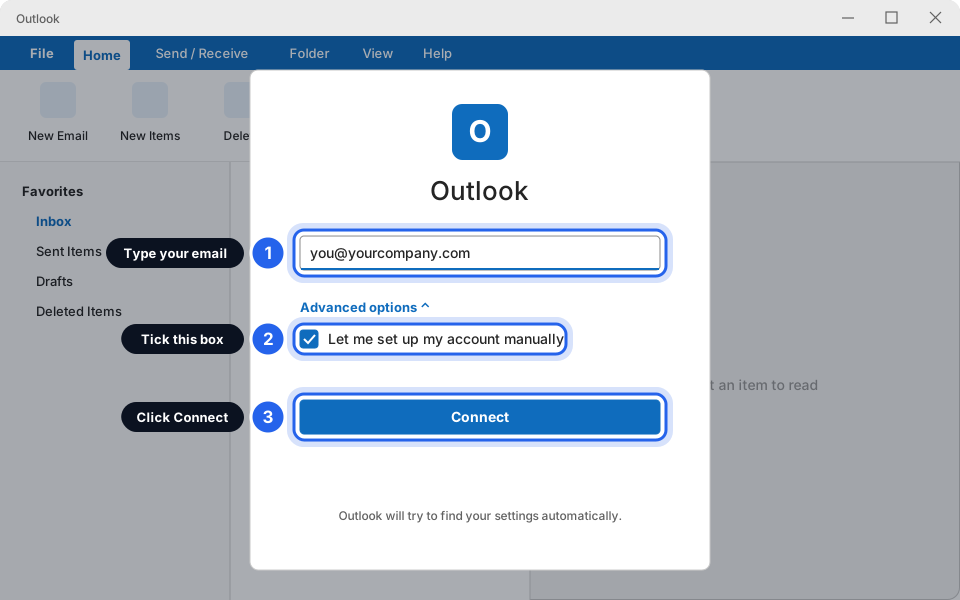
Type you@yourcompany.com. Then click Advanced options to show the tick box, and tick it.
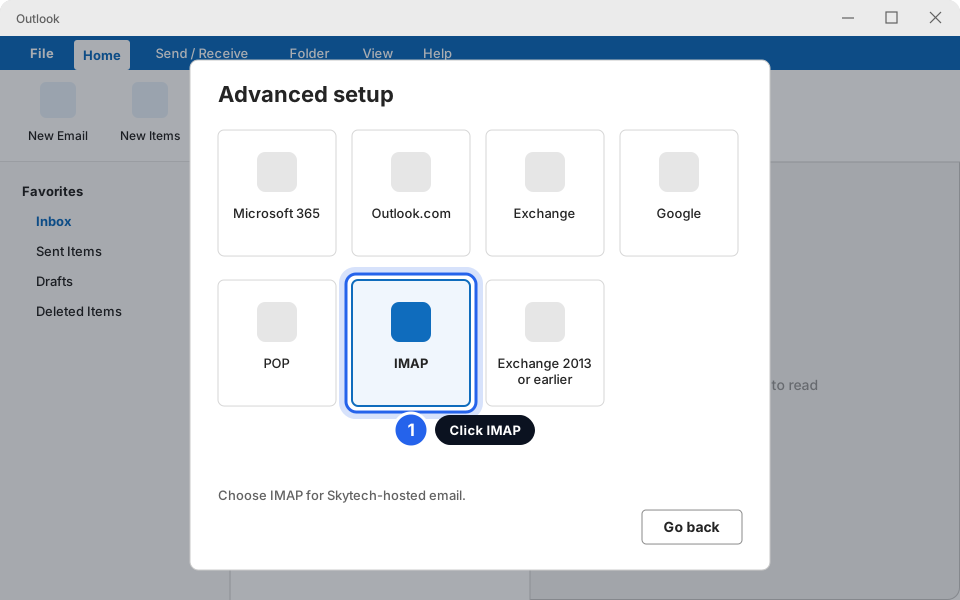
You'll see a grid of account types. Click the one labelled IMAP. (Not POP, and not Exchange.)
Why not POP? POP moves your email onto one computer, so your other computers and your phone stop seeing it. IMAP keeps everything in sync.
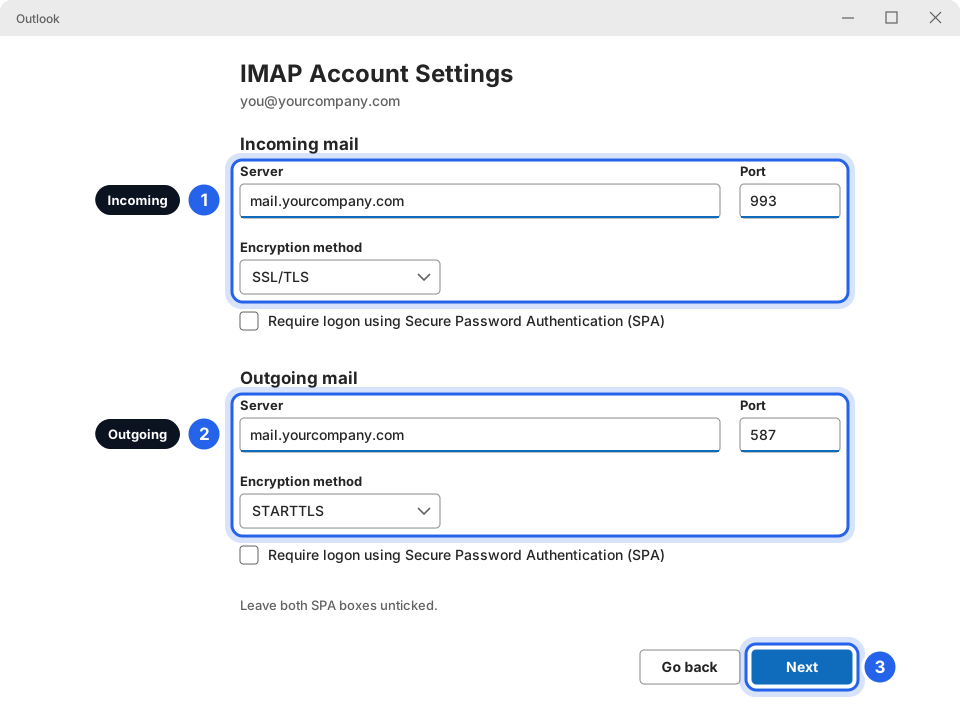
Copy these into the boxes exactly. Use the Copy buttons to avoid typos. Leave both SPA boxes unticked.
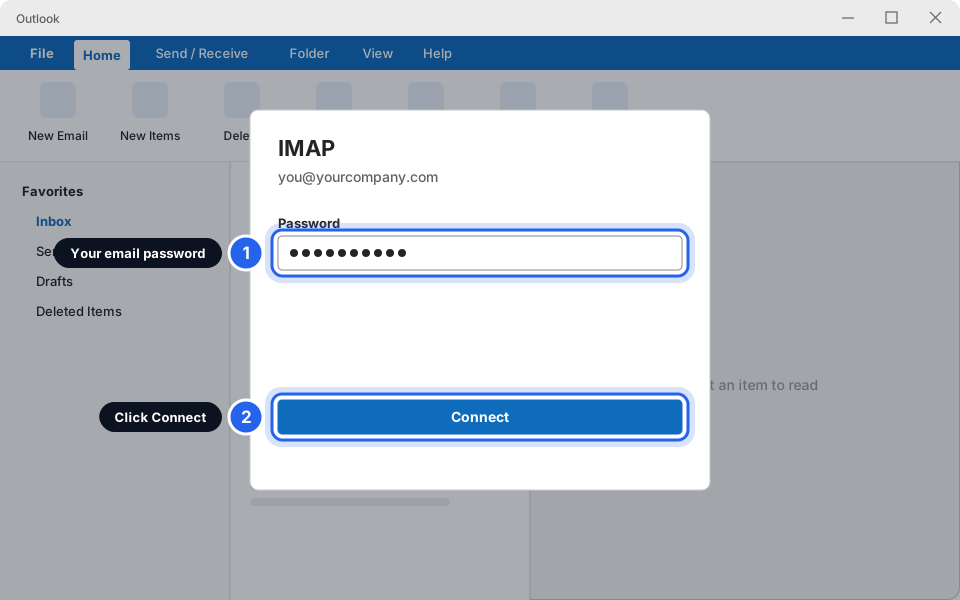
Use the same password you use for webmail. Passwords are case-sensitive, so check your Caps Lock.
When you see "Account successfully added", click Done. Close Outlook and open it again if your email doesn't appear straight away.
6 steps. Tick each one off as you go.
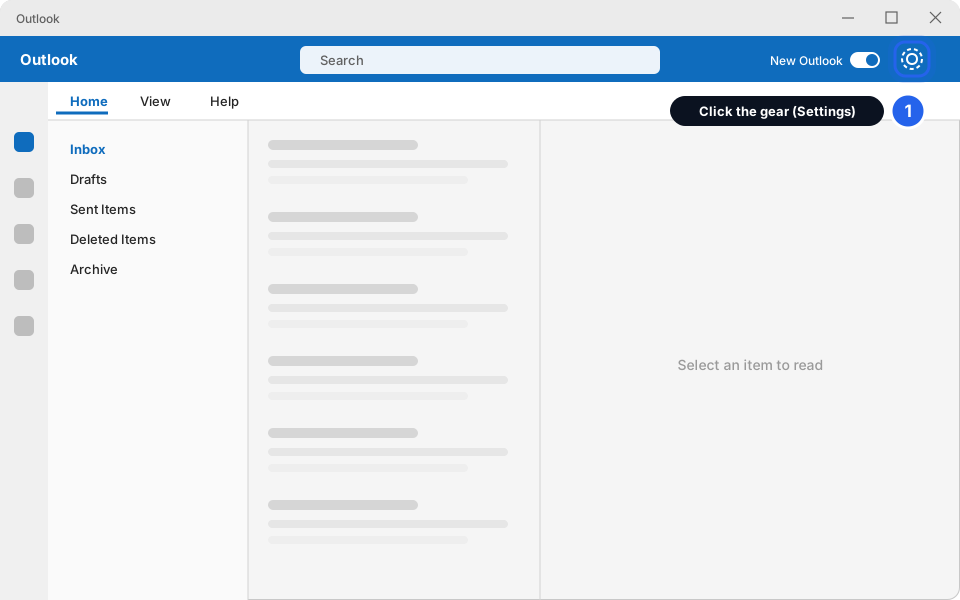
It's in the top-right corner, next to the New Outlook switch.
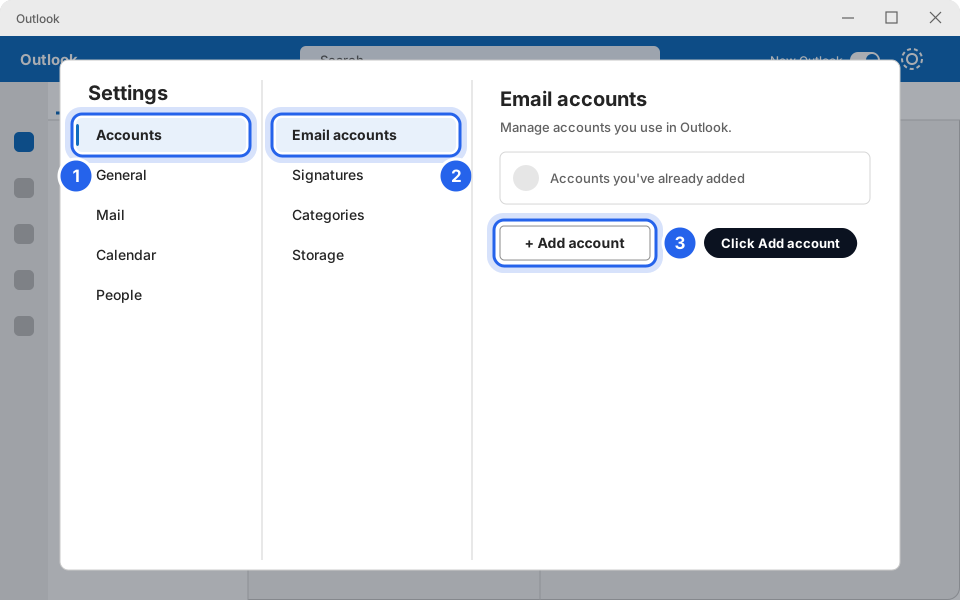
Work from left to right across the Settings window.
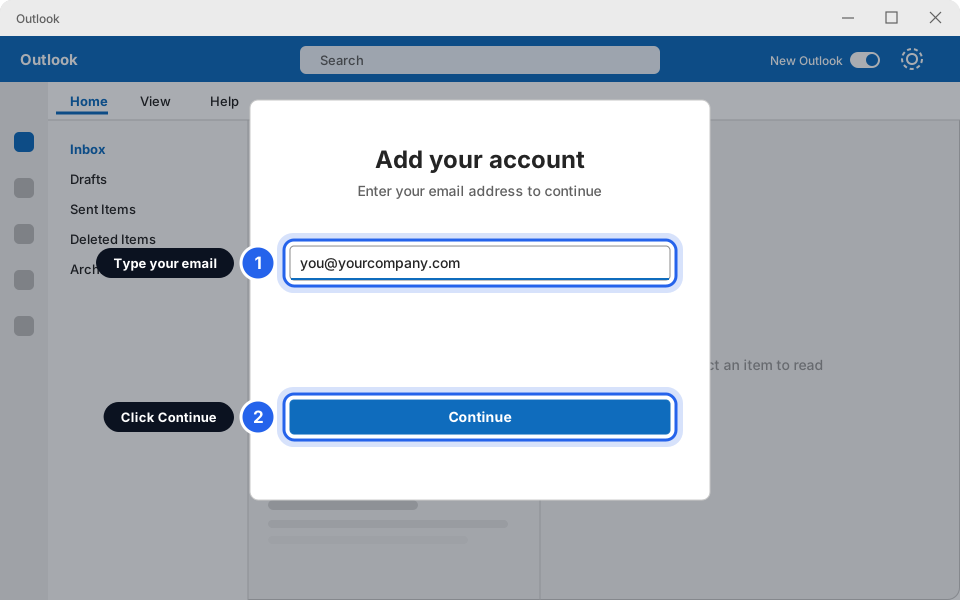
Type you@yourcompany.com exactly.
If your phone buzzes, open the Microsoft Authenticator app and tap Approve (or type the number shown on screen).
If you see "Stay signed in to all your apps", click the small blue link at the bottom. Don't click OK.
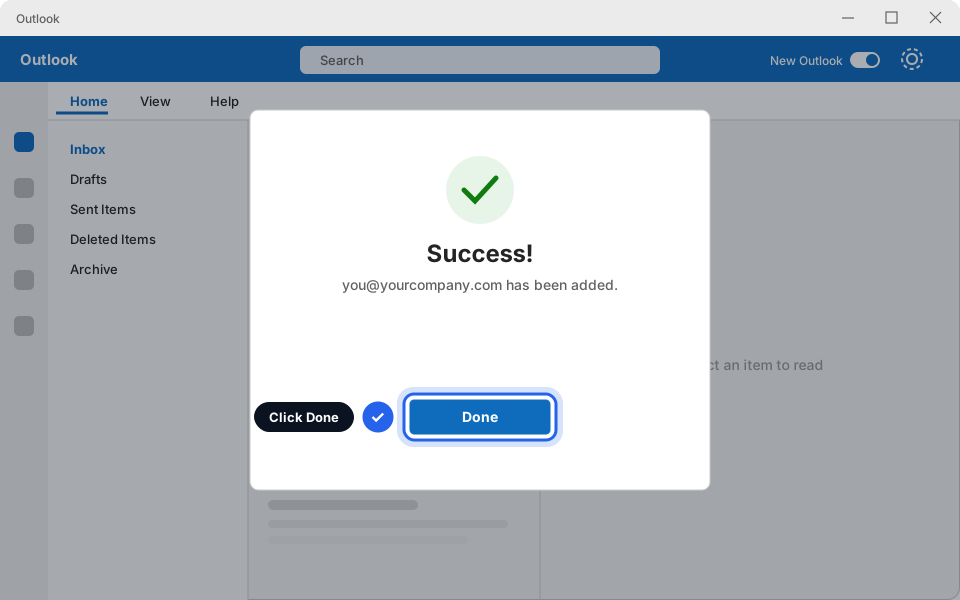
When you see "Success!", click Done. Your new account appears in the folder list on the left.
Click your new account in the folder list to see its inbox. The first sync can take a few minutes on a big mailbox.
7 steps. Keep your settings below handy, you'll need them in step 5.
It's in the top-right corner, next to the New Outlook switch.
Work from left to right across the Settings window.
Type you@yourcompany.com exactly.
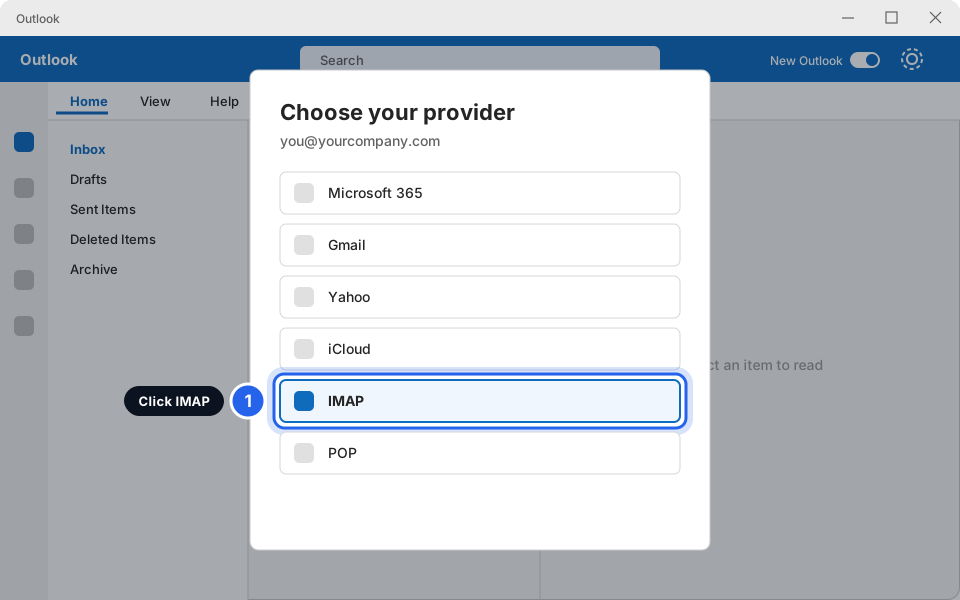
Outlook asks which provider you use. Click IMAP. If it skips this and goes straight to a Sync IMAP account screen, go to the next step.
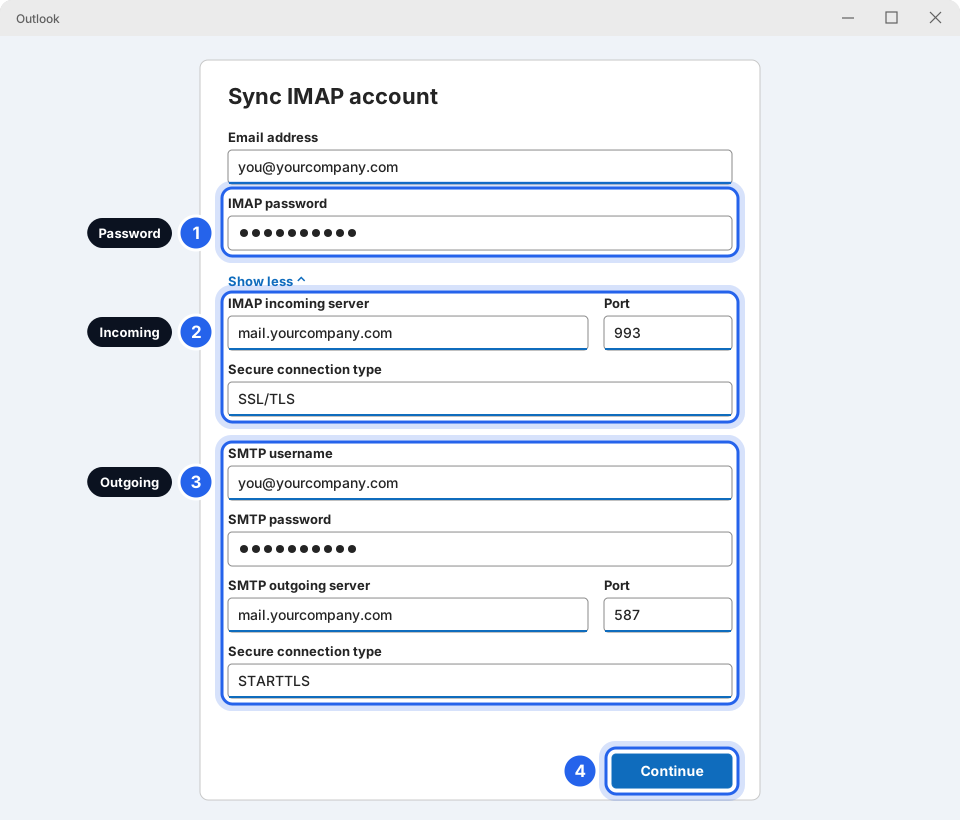
Type your email password in IMAP password. Then click Show more to open the extra boxes and copy these in exactly:
New Outlook keeps a copy of IMAP email in Microsoft's cloud so it can sync. That's normal, and you have to accept it to use IMAP in New Outlook. If you'd rather not, use Classic Outlook instead (switch the New Outlook toggle off).
When you see "Success!", click Done. Your new account appears in the folder list on the left.
Send yourself a test email to check that sending and receiving both work. If sending fails, see Troubleshooting below.
Usually the password is wrong. Check Caps Lock and try again.
Skytech-hosted email: test your password at https://webmail.yourcompany.com. If it doesn't work there either, message us and we'll reset it.
Microsoft 365: sign in at outlook.office.com in your web browser. If that works, close Outlook fully and try again. Forgotten it? See Reset your Microsoft 365 password.
Check that the server name is exactly mail.yourcompany.com, with no spaces and no www.
If the warning still appears, don't click "Yes" to continue. Message us. It's a quick fix on our side.
That's Outlook trying to set up your email automatically. Click Allow only if the web address shown ends in yourcompany.com.
If a security or certificate warning appears after that, click No or Cancel, and follow Plan B to type your settings in yourself.
Give it time. Outlook downloads your mailbox in the background, and a large mailbox can take an hour on slow internet. Leave Outlook open. With IMAP, click the little arrow next to your account name to expand its folders.
Close New Outlook completely and reopen it, then try again. If it still fails, use Classic Outlook (switch the New Outlook toggle off in the top-right corner) and follow the Classic steps. Then message us so we can look into it.
Don't remove or re-add your account. This usually means the office internet connection is being blocked, which we fix on our side. Message us and tell us which location isn't working.
One of them is probably set up with POP instead of IMAP. POP takes your email off the server, so other devices can't see it. Message us before changing anything, so no email gets lost.
See Using a shared mailbox. On Microsoft 365, shared mailboxes usually appear on their own once we've given you access.
Use the New Outlook switch in the top-right corner of the window. Turning it off brings back Classic Outlook, if your PC still has it installed.
Message the Skytech team and we'll walk you through it or connect remotely.
Pictures are simplified drawings of Outlook for Windows. Your screen may look slightly different depending on your Outlook version. Updated October 2026.